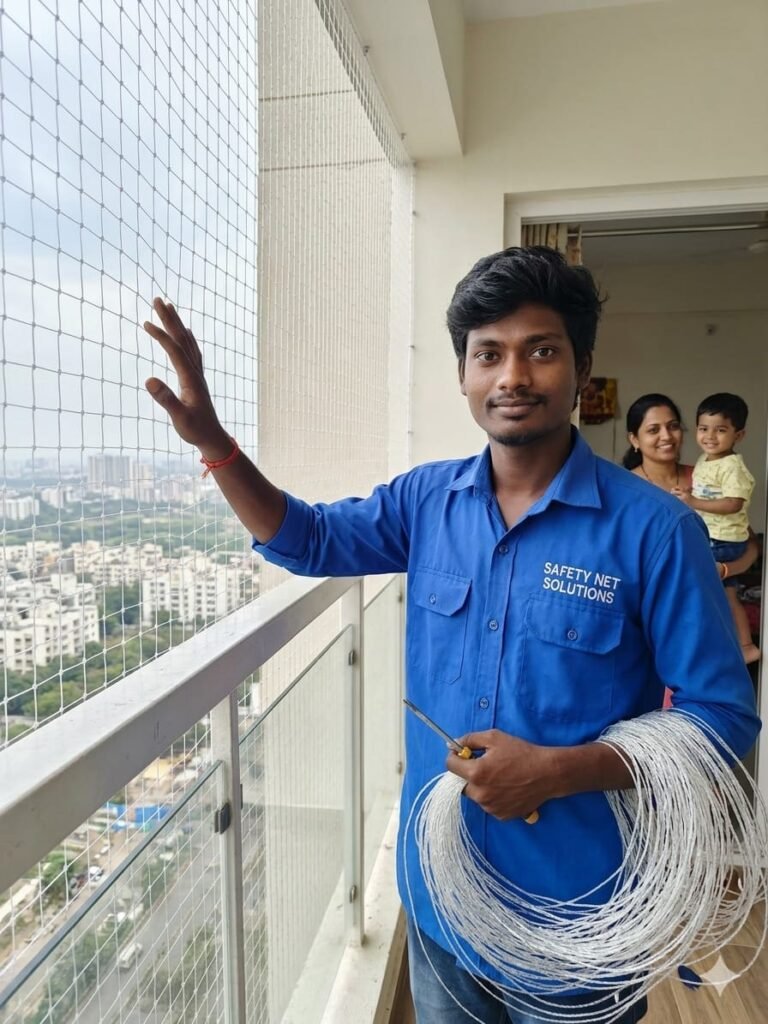
When you live in a high-rise apartment or a house with open staircases, your home’s greatest features—fresh air and stunning views—can also be your biggest sources of anxiety as a parent. A moment’s distraction is all it takes for curiosity to become a crisis.
Children safety nets act as the “invisible” guardians of your home, allowing kids to play freely while giving you total peace of mind. This guide covers everything from choosing the right materials to achieving a professional-grade installation.
- Choosing Your Material: Nylon vs. HDPE
Not all nets are created equal. Choosing the right material depends on your specific environment.
| Feature | Nylon Nets | HDPE (Polyethylene) |
|---|---|---|
| Strength | Very High (Impact resistant) | High |
| Weather Resistance | Moderate | Excellent (Waterproof/UV-proof) |
| Visibility | Nearly Invisible | Slightly Visible |
| Best For | Indoor/Staircases | Outdoor/Balconies |
The Safe Harbor Checklist: Tools Needed
- High-Durable Safety Net: UV-stabilized mesh (HDPE preferred for India’s sun).
- Measuring Tape: For precision.
- Impact Drill & Wall Plugs: To secure anchors into concrete.
- Stainless Steel Hooks: Must be Grade 304 or 316 to prevent rusting.
- PVC-Coated Steel Tension Cable: To provide the “skeleton” of the net.
- Step-by-Step Installation Guide
Step 1: Measurement & The 10% Rule
Measure the height and width of your opening. Always add 10% to your final measurements. This extra slack is essential for weaving and creating the tension required to stop a fall.
Step 2: The Perimeter Setup
Mark drilling points every 10–12 inches (25–30 cm). Consistency here is key—wider gaps can allow the net to “bow” under weight. Drill the holes and firmly fix your stainless steel hooks.
Step 3: The “Corner Square” Technique
Unfold your net and identify the four corners. Secure these to the corner hooks first. This ensures the net remains “square” and the tension is distributed evenly across the mesh, preventing a distorted look.
[Image Suggestion: Diagram showing the 4-corner anchoring sequence]
Step 4: Weaving the Tension Cable
Thread your PVC-coated steel cable through the outer loops of the mesh and the hooks along the perimeter. This cable acts as the load-bearer.
[Image Suggestion: Close-up of the tensioning cable weaving through the net loops]
Step 5: The Final Tension Test
Pull the cable taut until the net is firm. Use wire clips to lock the tension.
The Test: Lean against the net with moderate force. It should feel springy and firm—like a tennis racket—not loose or bouncy.
- Maintenance: The “Set and Forget” Myth
To ensure the net remains a reliable life-saver, follow this schedule:
- The 6-Month Inspection: Check for “brittle” mesh (a sign of UV damage) or fraying.
- Annual Tension Reset: Temperature changes can cause cables to expand. Tighten your cables once a year.
- Clean View: Use mild soap and water. Avoid harsh chemicals that can break down the UV coating of the mesh.
FAQ: Your Common Questions Answered
Q: Can birds get trapped in the net?
A: No. A 25mm–40mm mesh is small enough that most urban birds won’t attempt to fly through it, making it a bird-safe and child-safe solution.
Q: Will it ruin my view or make me feel claustrophobic?
A: Modern safety nets are incredibly thin (under 2mm). From a distance of 2–3 meters, they become almost invisible, preserving your view while providing security.
Q: Can I install this in a rented apartment?
A: Yes. Most installations only require small drill holes that can be easily patched. However, always check your lease agreement or get written consent from your landlord.
Conclusion
Creating a safe home environment shouldn’t mean sacrificing the light and space we enjoy. Children’s safety nets provide a crucial layer of protection, giving you the confidence to let your little ones explore. Whether you choose a DIY approach or professional help, the goal is the same: a home where the view is beautiful and the balcony is a safe place for memories.
Let’s Secure Your Home Today!
Don’t leave safety to chance.
- Need help with sizing? Share your balcony dimensions in the comments, and we’ll help you calculate the exact material needed.
- Download our Checklist: [Get the Ultimate DIY Safety Net Installation PDF].
- Talk to an Expert: Contact MPL Safety Nets for a free consultation or a custom-sized safety kit tailored to your home.